
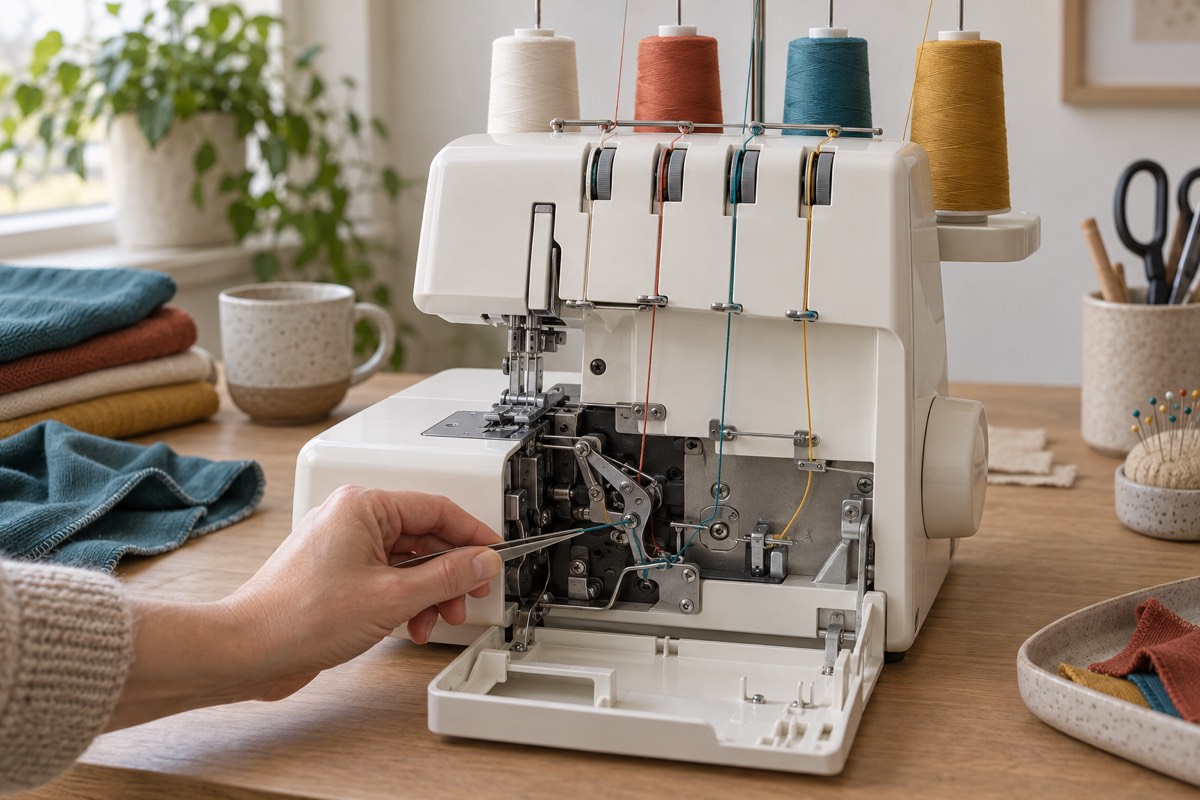
Overlockers look complex because several independent threads converge within a small area. The reliable way through is not memorising someone else’s colour order; it is using a repeatable preparation routine and your exact manual. Manufacturers differ in looper order, tension release, needle position and access levers.
Before you thread
- Switch the machine off. Unplug if the manual asks you to for threading or maintenance. Keep feet away from the pedal.
- Remove fabric and pins. Never leave a pin near the knife or needles.
- Raise the telescopic thread stand fully. Misalignment can cause thread to catch or feed unevenly.
- Fit suitable cones and spool supports. Use nets or caps only as the manual recommends.
- Open the covers and improve the light. Identify the colour-coded diagram, loopers, guides and any threading lever.
- Raise the presser foot and position the mechanism as directed. On many machines this releases tension discs, but the exact method is model-specific.
Use four clearly different thread colours for the first diagnostic sample, matching each colour to the machine diagram. This lets you see whether a loop belongs to a needle, upper looper or lower looper. Change to project thread after the stitch is understood.
A universal method without inventing the order
The following workflow is universal; the actual first, second, third and fourth paths are not.
1. Read the setup table
Find the manual section for the chosen 3-thread or 4-thread stitch. Confirm which needles are installed, whether a spreader or converter is involved, the recommended starting tension, stitch length, cutting width and differential setting.
2. Thread one complete path at a time
Start with the thread the manufacturer names first. Route it through the stand, top guides, tension path and every numbered or coloured guide. Do not move to the next cone until the thread tail emerges where the diagram shows.
The Brother 2104D includes a lower-looper threading aid and colour-coded paths. That reduces the reach to one awkward section, but each guide and the prescribed order still matter.
Brother 2104D
Best for a first-time overlocker owner who wants the core controls, useful threading assistance and a widely documented domestic model without paying for a large accessory bundle.
A compact 3/4-thread overlocker with colour-coded threading, a lower-looper threading aid, differential feed, a free arm and an instant rolled-hem changeover.
Keep in mind
- It is an overlocker, so it does not replace a sewing machine for buttonholes, topstitching or construction away from an edge.
- Threading is still a multi-step process and must follow the machine manual in the stated order.
3. Check the hidden guides
Most failures come from one missed hook near a looper, needle bar or tension disc. Use tweezers supplied or recommended for the machine. Do not place fingers near a blade or force a looper sideways.
4. Thread the needles last if the manual says so
Many common overlockers specify loopers before needles because the threads cross in a defined relationship. If a needle thread passes behind a looper thread when it should pass in front, the stitch may not form. Again, use the model diagram rather than assuming the convention.
5. Close covers and test by hand
Draw the thread tails under and behind the presser foot as instructed. Close every safety cover. Turn the handwheel in the stated direction for a few cycles, watching that threads move freely and the needles clear the loopers. Then switch on and form a short chain at low speed.
6. Sew a labelled fabric sample
Test on a double layer similar to the project. Judge the stitch on fabric, not only as a free chain. The needle threads should secure the seam while looper threads meet around the cut edge without pulling it into a hard cord or hanging loosely beyond it.
Can you tie on new overlocker thread?
Tying a new colour to the old tail and pulling it through can save time, but it has limits:
- use a small secure knot that can pass the guides;
- reduce or release tension only as the manual directs;
- stop before each needle eye, cut the knot and thread the needle manually;
- never drag a knot through a needle eye, delicate tension path or air-threading port;
- if a thread breaks or the path is uncertain, remove it and rethread correctly.
Tie-on changes preserve an already correct path; they do not teach it. Thread the machine from empty several times while learning so a broken thread does not end a project.
The Brother 3034DWT is worth considering when you also want a wide table, adjustable pressure and included garment feet. Those accessories do not change the need to understand the threading sequence.
Brother 3034DWT
Best for a beginner who expects to sew garments regularly and will genuinely use the wider support surface and included specialist feet.
A 3/4-thread overlocker supplied with a wide table, trim trap and blind-stitch, gathering and piping feet, plus differential feed and adjustable presser-foot pressure.
Keep in mind
- The accessory bundle costs more and is poor value if you only need occasional seam finishing.
- Its maximum 1,300-stitch-per-minute speed is capacity, not a reason to rush while learning.
When the chain will not form
Work through causes in a fixed order:
- Switch off and confirm the correct needle system, insertion direction and needle height.
- Remove every thread and rethread in the manual’s order with the presser foot positioned as instructed.
- Check that each thread is inside—not beside—its tension path.
- Confirm looper threads cross in the relationship shown by the diagram.
- Return tension, stitch length, cutting width and differential feed to the manual’s baseline.
- Close all covers, lower the presser foot and test on a stable double-layer offcut.
If thread snaps, inspect for a damaged or incorrectly fitted needle, poor thread, a caught spool, an over-tight setting or a missed guide. If the handwheel becomes resistant, stop. Do not force the pedal; remove power and use authorised support if basic setup checks do not clear the obstruction.
The Janome 9300DX is another conventional colour-coded option with differential feed and adjustable cutting width. Its mechanical controls make the baseline easy to record on a sample card.
Janome 9300DX
Best for a learner who wants clearly labelled mechanical controls, adjustable seam width and a relatively compact eight-kilogram machine.
A compact 3/4-thread overlocker with colour-coded threading, differential feed, adjustable cutting width and a retractable upper knife.
Keep in mind
- It does not include the broad table-and-feet bundle supplied with some rivals.
- As with every overlocker, stitch quality depends on correct threading, needle choice, tension and a fabric test.
Features that make threading easier
Colour coding, a lower-looper lever, a wide cover opening and a built-in light all help. Air threading can move looper threads through enclosed tubes, reducing manual routing, but needle threads still need attention and the feature raises cost. Automatic tension can simplify a starting point, though fabric sampling remains necessary.
When comparing machines, ask a dealer to let you rethread from empty. A demonstration performed entirely by someone else reveals very little about whether you can see the guides or reach the lower looper.
Frequently asked questions
Which overlocker thread should I use?
Use a suitable, good-quality thread that fits the machine guidance and project. Large overlocker cones are economical and feed smoothly, but specialist decorative or woolly threads may be limited to particular paths and settings.
Why does my overlocker unravel?
An overlock chain can pull out from an unsecured end. The appropriate finish depends on the seam: chain off and knot, weave the tail back, stitch over an existing seam, or secure it using a method approved for the project.
Should all four tensions be the same?
Not necessarily. The manual provides a baseline, then fabric, thread and stitch configuration determine balance. Diagnose with contrasting colours and adjust one control at a time.
Sources
The safety and process guidance is grounded in the Brother 2104D manual library, official Brother 3034DWT specifications, Janome 9300DX specifications and the Janome overlocker guide.