
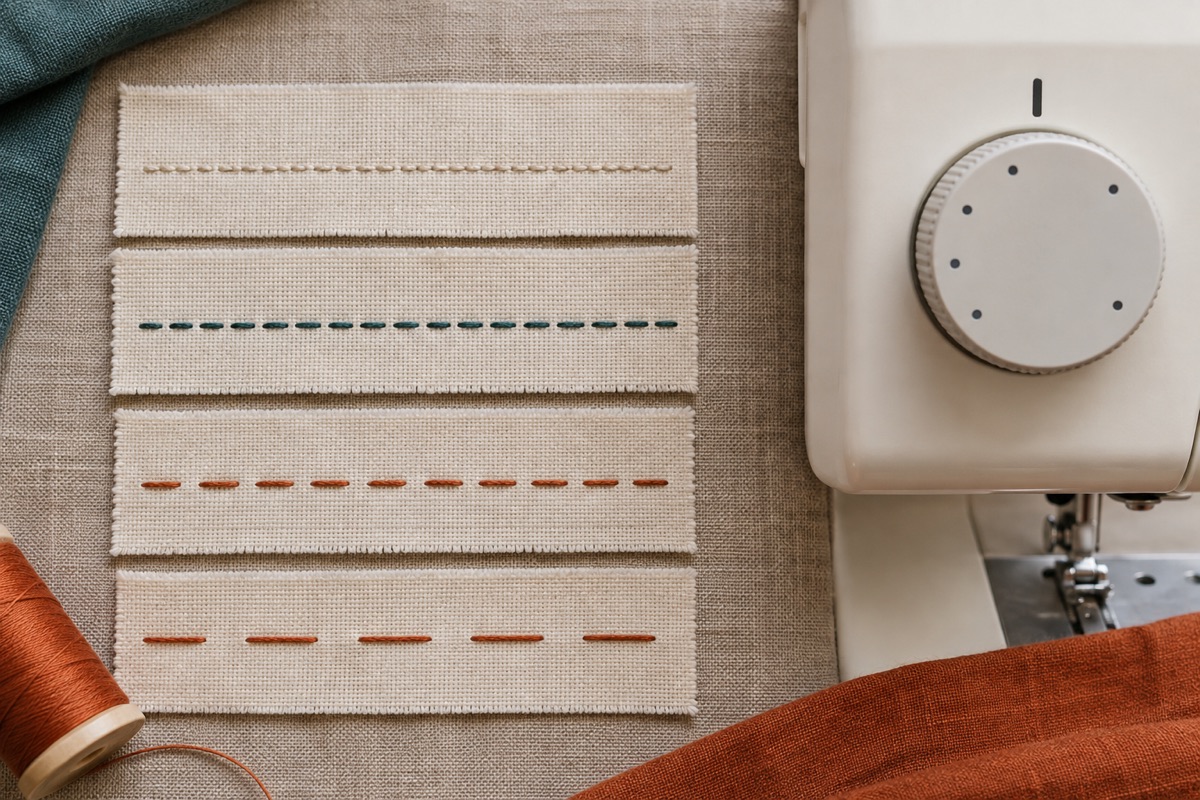
On an ordinary domestic machine, the stitch-length control changes how far the feed advances fabric between needle penetrations. A larger millimetre number generally makes longer straight stitches. It does not change thread tension, needle suitability or the seam allowance. Some decorative and stretch stitches use their own length range, so check the stitch chart before assuming a straight-stitch number transfers directly.
What changes when stitches get shorter or longer?
Short stitches put more needle holes into the same distance. That can secure a small curve but may perforate delicate or coated fabric and makes unpicking harder. Longer stitches are visible and can travel well over some thick stacks, but they may look loose or snag in a hard-wearing seam. A very long stitch is useful for temporary basting or gathering, not automatically for a structural garment seam. Fabric thickness, needle and thread all change the result; no chart can replace a test.
Reasonable starting tests
| Job | First sample to try | What to assess |
|---|---|---|
| Stable woven garment seam | About 2.5 mm | Flat seam and balanced thread |
| Fine woven or small curve | Slightly shorter than the normal seam | Puckering and excessive needle holes |
| Visible topstitching | Roughly 3–4 mm on a suitable medium/heavy fabric | Even, attractive spacing after pressing |
| Temporary basting or gathering | A long straight stitch within the machine's range | Easy removal or smooth gathering |
| Bulky crossing | A modestly longer test stitch | Whether the machine feeds without tiny stitches or needle deflection |
These are trial values, not safety limits or universal prescriptions. Janome's topstitching guidance gives 3–4 mm as a common range for bottom-weight garments, not every shirt or quilt. Your pattern or model manual may specify another value. For knit seams, use the correct stretch-capable stitch first; simply lengthening an ordinary straight stitch will not make it reliably stretch.
Test the seam you will actually sew
Fold the same fabric to the same number of layers, use the final needle and thread, and sew a line long enough to inspect. Make three adjacent lines, changing only length. Press them as the project requires, then bend or gently stretch them according to use. Choose the line that lies flat and suits the job. Write the setting on a separate note if you expect to repeat it; do not rely on remembering a number from a different fabric.
If the machine makes tiny stitches only at a thick seam crossing, the foot may be tipped or the fabric may be dragging. Level the foot and support the work before increasing stitch length. If stitches become uneven throughout the seam, inspect feed dogs, foot pressure and whether you are pulling the fabric.
Problems a length dial cannot solve
Loops underneath point first to threading or top-thread tension, not stitch length. Skipped stitches point to needle, thread, fabric or foot setup. A wandering seam needs a better edge guide and fabric support. Thread breakage needs its own diagnosis. Changing several controls at once hides the cause; return to the manual's baseline and adjust one thing on a spare swatch.
Frequently asked questions
Is 2.5 mm always the best default?
No. It is a convenient starting test for ordinary stable woven seams. Fine, thick, stretchy or coated materials can need a different stitch and length.
Does longer mean stronger?
Not automatically. Seam strength depends on the whole setup and use. Too few stitches can reduce security; excessively short stitches can damage some fabrics.
Sources
The visible-topstitch starting range follows Janome's topstitching guidance. Follow your exact machine's stitch chart for its available length and stretch-stitch controls.