
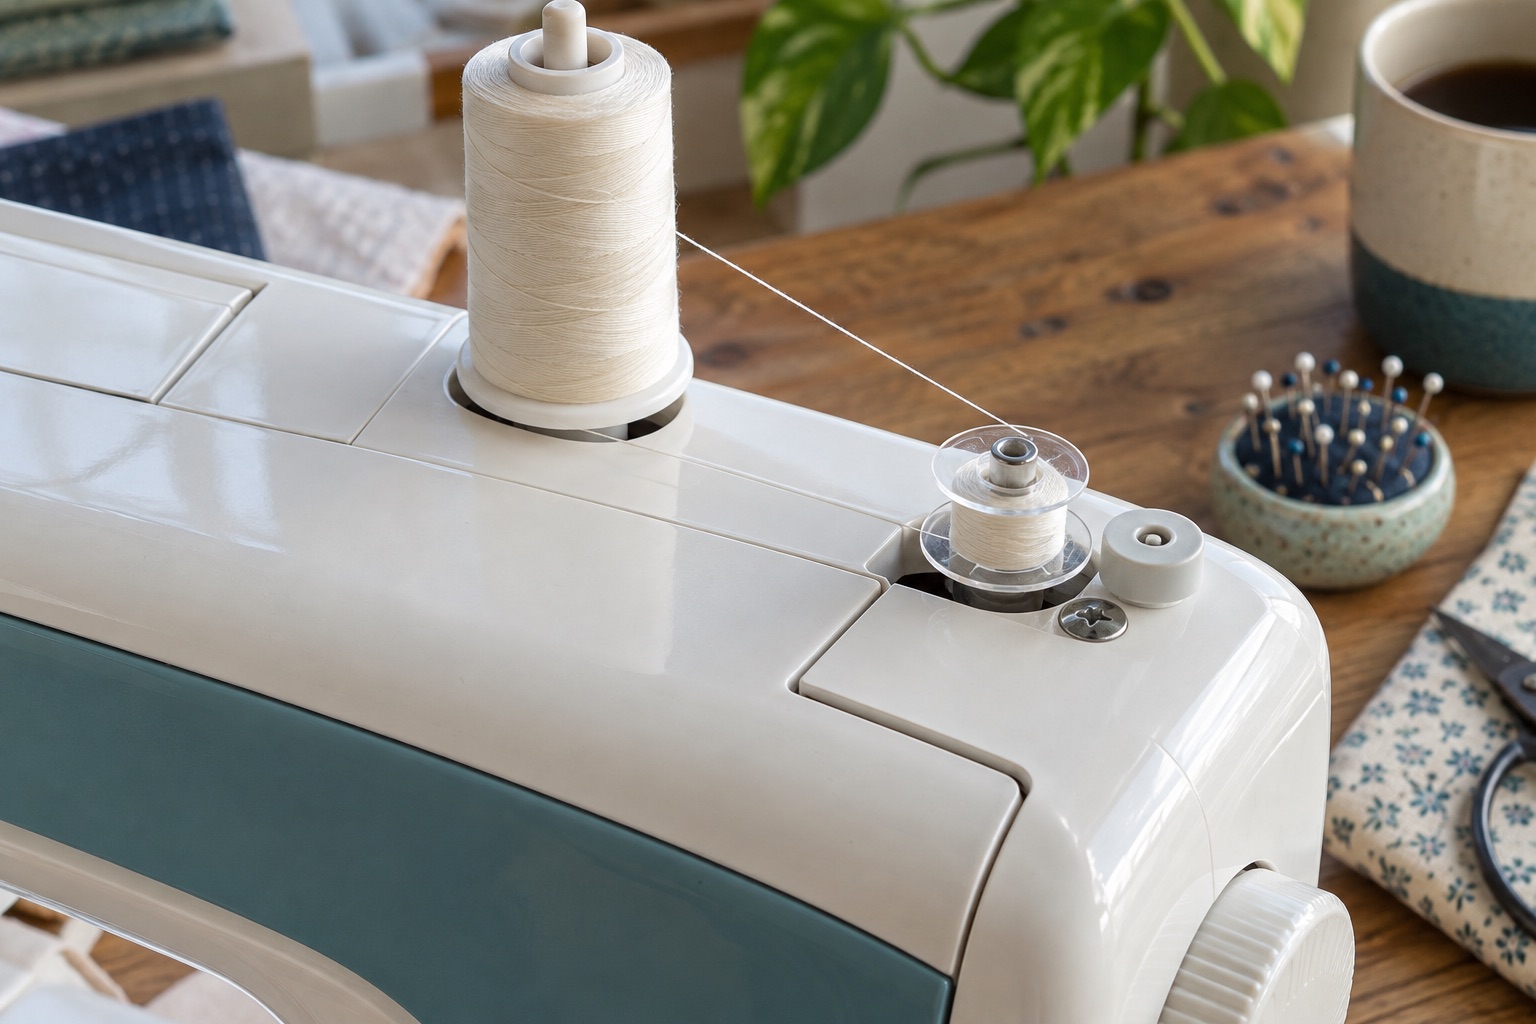
A bobbin should fill evenly and turn freely in the system designed for it. The winding route is separate from the upper-thread sewing route: pulling thread straight from the spool to the bobbin can bypass the small pre-tension guide and produce a loose, lopsided wind. The exact guide positions, bobbin orientation and start method vary, so keep the model manual beside the machine.
Start with the right bobbin and ordinary thread
Read the machine's model number and find its bobbin part code in the manual or maker's support pages. Bobbin height, rim shape and material matter. A spare that drops onto the spindle is not automatically suitable for the sewing mechanism. Our bobbin compatibility guide explains what to match before ordering a pack.
For a first control sample, use sound all-purpose sewing thread rather than old, brittle or decorative thread. The white Gütermann Sew-All spool below is one example of an everyday polyester thread family; the linked colour is white, so choose another shade for a dark project. A new machine normally includes enough thread and bobbins to begin, so neither purchase is mandatory.
Gütermann Sew-All polyester thread, white
A reliable general-purpose thread family for mixed garment fabrics; choose the shade that blends with your project rather than buying white by default.
A 100 m spool of 100% polyester Sew-All thread for everyday construction seams, repairs and machine sewing.
Keep in mind
- The linked listing is white; match colour locally if needed.
- It is not the same as a deliberately heavy decorative topstitch thread.
Wind the bobbin in your model's order
- Put the machine on a stable table. Switch it off while placing the spool and bobbin, and keep fingers clear of moving parts. Place the spool and cap in the orientation specified for its shape.
- Lead the thread through the bobbin-winding guide and around any small pre-tension disc shown on the machine. This is often on the top of the casing, not the numbered upper-thread path used for sewing.
- Pass the thread through the bobbin's starting hole or secure its first turns exactly as the manual instructs. Seat the empty bobbin fully on the winder spindle and move the spindle into winding position.
- Hold the starting tail only where the manual asks you to, then wind a few turns slowly. Stop and trim the exposed starting tail so it cannot be buried in the wound thread. Keep your fingers away from the rotating bobbin.
- Continue at a steady moderate speed. Let the built-in stop act if your machine has one; stop manually at the permitted fill if it does not. Do not wind beyond the bobbin rim.
- Switch off, slide the spindle back to sewing position and lift off the bobbin. Cut the thread to separate it from the spool. Do not pull the bobbin off while it is still turning.
Some machines disengage the needle automatically while winding; others require a model-specific handwheel or clutch action. Do not force a control whose operation is unfamiliar. If the needle still moves, consult the manual before continuing.
Brother's SFB/SA156 bobbins are suitable only for the Brother models whose instructions specify that 11.5 mm plastic part. The product below is a spare option after that check, not a universal replacement.
Brother 11.5 mm sewing-machine bobbins, pack of 10
A useful spare set after confirming the exact Brother model's bobbin part code in its manual or support page.
Ten 11.5 mm plastic bobbins for Brother machines whose manual explicitly specifies SFB or SA156; not a universal bobbin replacement.
Keep in mind
- Do not use if your machine specifies another bobbin height, shape or material.
- The Amazon title alone does not prove compatibility with every Brother machine.
What should a wound bobbin look like?
The thread should form reasonably level layers across the usable barrel. A small amount of variation is normal; a steep cone, bulging side, loose loops or thread spilling over the rim is not a good starting point. Unwind a poor result and wind it again after checking the pre-tension path. Do not squeeze an overfilled bobbin into its case. If the bobbin is cracked, warped or burred, replace it with an exact compatible part.
Winding is only the first half of the job. Next, follow either the top-loading insertion guide or the front-loading case guide. The bobbin may unwind in a different direction in each model; the cover diagram or manual decides.
If the bobbin winds unevenly or will not wind
If thread piles up at one end, recheck that it passes around the winding pre-tension guide rather than over it. If the first turns slip, repeat the manual's starting method and trim the tail after a few turns. If the winder does not turn, check that its spindle is fully engaged and that the foot controller or start button is being used as specified. If the machine will not sew after winding, return the spindle to sewing position.
Stop if the spindle wobbles, the machine knocks or thread catches under the winder. Do not dismantle the winder or pull hard on trapped thread. Switch off and use the manual or a technician for a mechanism that still resists.
Frequently asked questions
Can I wind a bobbin with a different thread colour?
Yes, when the thread is appropriate for the project and machine. It may show through fine or pale fabric, so match it to the seam you plan to sew.
Why is my bobbin loose and spongy?
The winding thread may have missed its pre-tension guide, or the start was not held as directed. Remove the loose thread and rewind rather than relying on the bobbin in a test seam.
Should the bobbin be filled right to the edge?
No. Stop at the fill indicated by your machine's winder and manual. An overfilled bobbin can rub or jam in its case.
Sources
Brother's bobbin-winding instructions show a dedicated winding guide, initial tail and automatic-stop sequence for a specific model. Its model-specific bobbin guidance explains why spares must match. Follow the manual for your own machine where the sequence differs.