
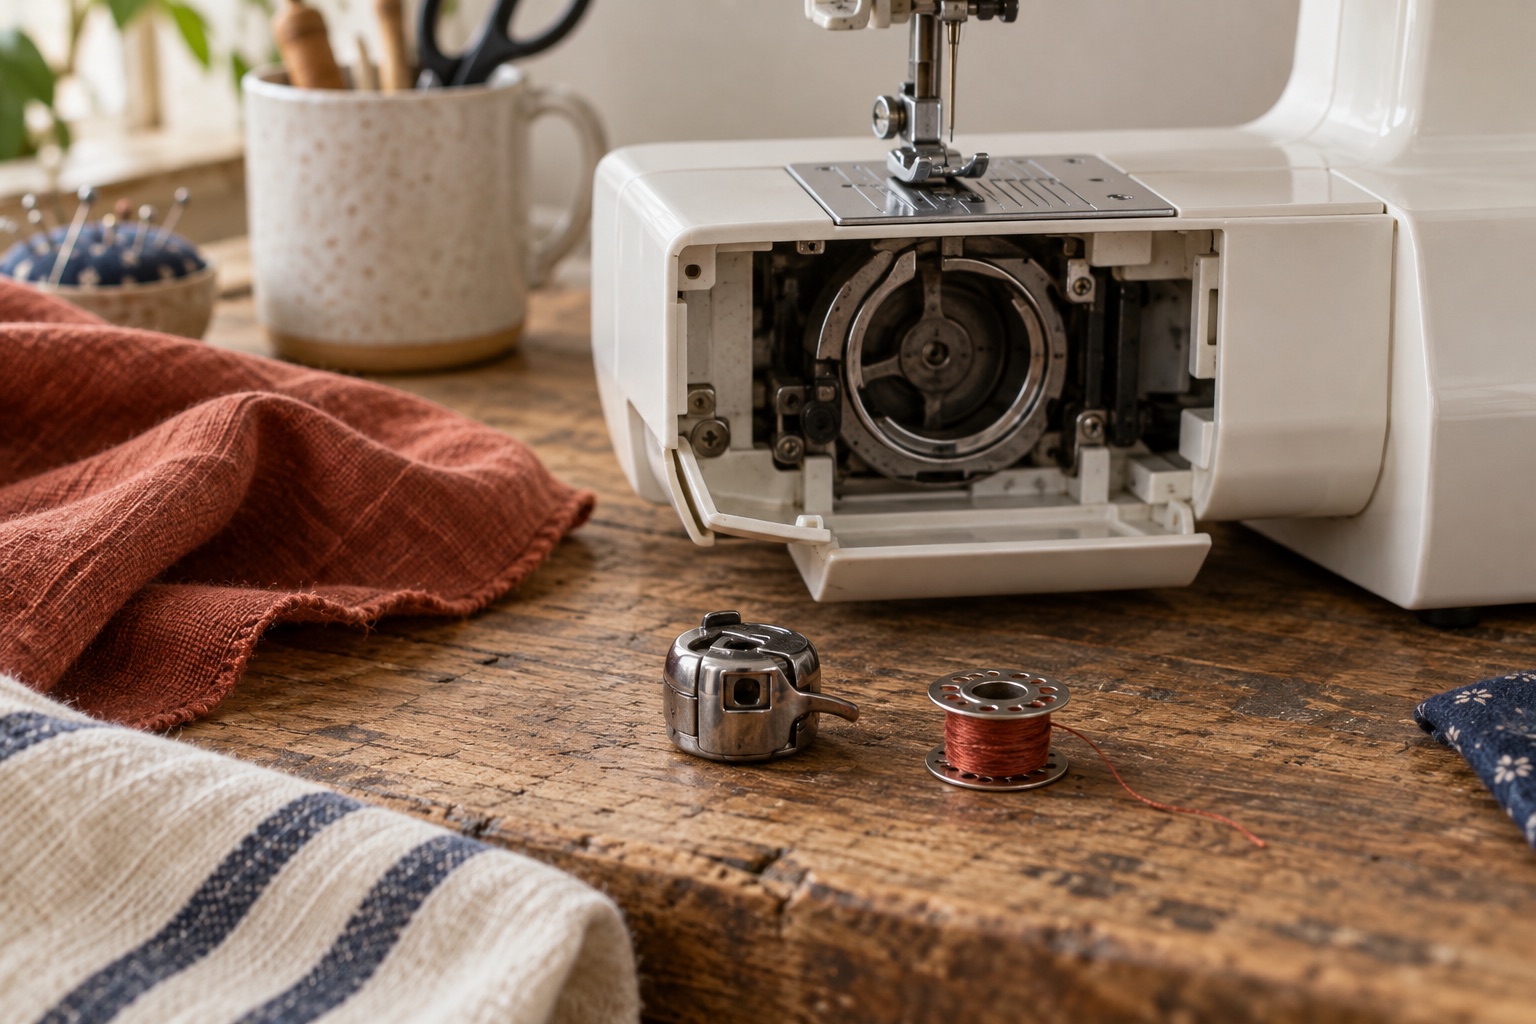
A front-loading machine commonly holds the bobbin in a separate removable case behind an access flap below the needle plate. You load the bobbin into the case first, then fit the case into the machine. That extra piece is the main difference from a top loader. The photographs on other machines can help you recognise the parts, but the orientation and release method in your own manual decide what to do.
Check the case and bobbin before starting
Switch off or unplug. Raise the needle as your manual directs and remove the extension table or free-arm tray if it blocks the front flap. Open only the ordinary bobbin access door. Do not remove the needle plate or internal covers unless the manual specifically requires it for this task.
Identify the correct bobbin code for the model. Front-loading is a description of where the case is, not a bobbin size. Metal cases and bobbins from two machines can look alike without being interchangeable. Check that the wound thread is even, the bobbin rim is undamaged and the case has no visible thread trapped under its latch. Our compatibility guide explains why a mixed tin of spares is risky.
Put the bobbin into its removable case
Hold the case so you can see its open side and its thread slot. Place the bobbin in the case in the orientation shown in the manual. Manufacturers may describe this by the direction the thread comes off the bobbin; do not transfer a clockwise rule from another machine. Pull the thread into the side slit, then along and under the case's tension spring or guide until it emerges at the position shown. Leave the specified tail. A gentle, even pull should draw thread through the spring rather than out of a loose loop.
Do not turn the tiny case-tension screw because the thread seems different from a top-loading machine. An incorrectly routed thread, unsuitable bobbin or trapped lint is more likely on a first setup. If the bobbin is not yet wound, wind it evenly using the machine's separate winding path.
Seat the case without forcing it
Hold the case latch or finger grip as your manual describes. Align its locating finger or notch with the race opening and bring it straight into place. Release the latch once the case sits securely; the manual may describe a click or a position check. Replace the front flap and free-arm tray if appropriate. Keep fingers clear of the needle and do not operate the machine with the case loose or the access door obstructed.
Many front-loading machines ask you to bring up the bobbin thread by holding the upper tail and rotating the handwheel through one stitch cycle. Follow the precise model directions, including handwheel direction. Then place both tails as directed, thread the upper path with the foot raised and sew a short test line on two layers of woven cotton. Inspect the seam on both faces before changing tension.
The Janome 2200XT is a current mechanical machine with a front-loading bobbin. The card is useful if you are comparing machine layouts; it is not a replacement for its instruction book, and we do not recommend buying a new machine to solve an ordinary case-insertion question.
Janome 2200XT
Best for a beginner who prefers simple controls but wants drop feed for free-motion work and a broader utility-stitch range than the most basic machines.
A six-kilogram mechanical all-rounder with 22 stitch options, adjustable stitch length, drop feed and a free arm, operated through two main dials.
Keep in mind
- The front-loading bobbin is less visible while sewing than a clear top-loading system.
- The buttonhole is a four-step design rather than a one-step automatic cycle.
If the case does not fit or the first seam is poor
Stop and switch off. Remove the case by its latch and check the alignment and thread path again. Compare its bobbin with a confirmed original. A case that will not seat, falls out or rubs audibly should not be forced or used for a test seam. If the case seats but thread bunches underneath, the upper path may be at fault; rethread with the foot raised. If the handwheel binds, unplug and follow the jam checklist rather than driving the motor against the resistance.
Frequently asked questions
Does every front loader use the same metal bobbin?
No. Case access does not specify bobbin dimensions or material. Find the exact manufacturer part code for the machine.
Should I adjust the screw on the bobbin case?
Not for ordinary first-time setup. Confirm the bobbin, thread route and upper threading first. Case-tension adjustment is model-specific and easy to disturb.
Why does the bobbin case keep falling out?
It may not be aligned or seated, or its latch or locating parts may be damaged. Stop using the machine and consult its manual or a technician rather than forcing the case.
Sources
The Janome 2200XT product specification identifies its front-loading arrangement. Janome UK's bobbin guide describes separate top- and front-loading case sequences. For case direction, spring route and latch location, follow the instruction book for the exact front-loading model.